October 24, 2026
Photographing a finished mosaic can feel like a small betrayal. You spend weeks cutting and setting tesserae, and the camera hands back a flat sheet of white reflections. Colors go chalky, the andamento disappears, and a piece that shimmers in person looks like a printed poster of itself. The good news is that glare is almost never the camera's fault. It is a geometry problem, and geometry can be solved with a window, a sheet of white foam board, and twenty minutes of careful rearranging.
Work in this order: light first, then angle, then settings, and only then the editing sliders. Skip a step and you will spend twice as long at the screen trying to rescue something the camera never captured.
Why glare is the enemy of mosaic photography
Every tessera is a small mirror. Glass smalti, glazed ceramic, marble, gold-backed tesserae — they all send a portion of the light that hits them straight back out at the angle it arrived. When the source, the surface, and your lens line up, that reflected light lands on the sensor as a specular highlight: a white blob with no color inside it. Once a highlight clips to pure white, no slider recovers what was underneath.
There is a second, quieter problem. Flat, head-on light also kills texture. Tesserae read as three-dimensional because their edges catch light and drop tiny shadows into the grout lines. Front lighting fills those shadows in, and the piece ends up looking like a photograph of a photograph of a mosaic.
Put the light to the side, not on the piece
Angle of incidence equals angle of reflection — the one piece of physics worth memorizing. If the light comes in at roughly 35 to 45 degrees to the surface and the camera looks straight on, the strongest reflection bounces off to the side, away from the lens. That raking light also gives you the second thing you want: shadows in the grout lines, which is what makes tesserae read as tesserae.
Window light is usually enough
A north-facing window (south-facing, if you are in the southern hemisphere) on an overcast day is close to a perfect studio. Set the piece on a table near the glass, then rotate the piece — not the camera — until the light skims across it from one side. Stand so the lens is square to the mosaic. Turn off the ceiling lights, and keep the flash off permanently; both hit the surface straight on and hand you back exactly the glare you are trying to lose.
Diffuse, then fill
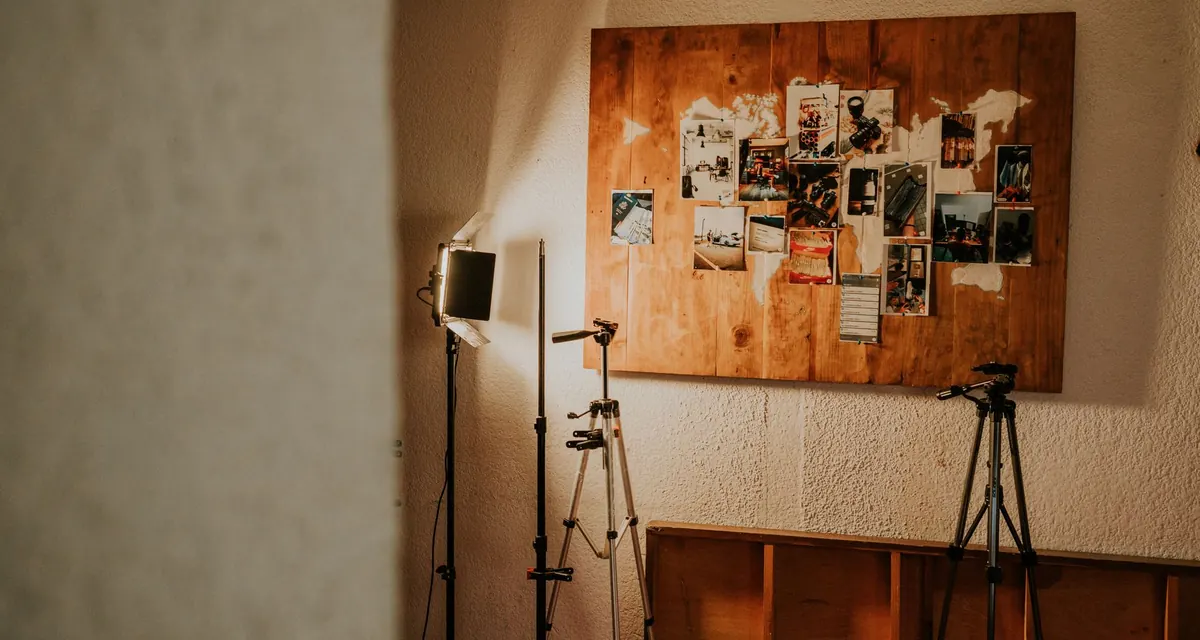
Bare window light on a sunny day is still too hard. Tape tracing paper, a white shower curtain, or a sheet of frosted acrylic over the glass, or clip diffusion to a stand in front of an LED panel. Then place a white foam board on the opposite side as a bounce to lift the shadow side. If the piece is glass, a black card on one side kills stray reflections coming in from the room. Move the diffusion closer to the mosaic to soften the highlight further — the larger the light source relative to the piece, the softer the reflection becomes.
Find the angle where the hotspot slides away
Keep the light where it is and move the camera. Watch the bright hotspot on the surface as you shift left or right. It will travel across the tesserae, and there is usually a window of ten or fifteen degrees where it slips off the lens entirely. That is your shot. Take one frame slightly left and one slightly right, then compare them on a large screen — the difference in texture is often obvious.
Two cautions. First, keep the camera back parallel to the plane of the mosaic. Tilt up or down and the piece goes trapezoidal; you can correct it in software, but the correction stretches tesserae and quietly changes proportions. Put the lens at the center height of the piece and use the grid overlay or a small spirit level on the tripod head. Second, if the mosaic is fixed to a wall and cannot move, move the light instead: an LED panel on a stand, a card bouncing window light across the room, or simply shooting at a different hour.
Camera settings that keep color honest
Glare is the visible problem. Color drift is the one that shows up two weeks later, when the gallery grid looks like work by six different people.
- Tripod, timer, remote. Two seconds is enough. Hand-holding invites shake at the small apertures you want, and it makes frames hard to compare.
- Base ISO. 100 or 200. Noise muddies the mid-tone color that mosaics live in.
- Aperture around f/8 to f/11. Enough depth of field for the whole surface, before diffraction softens everything. For very large pieces, square up and back away rather than stopping down further.
- Manual white balance. A custom reading from a gray card is best; failing that, lock a fixed preset. Auto white balance shifts between frames and your set will drift.
- Shoot RAW if you can. You get far more room to pull back highlights and correct color casts.
- Expose for the highlights. Check the histogram: nothing should clip on the right. Shadows can be lifted; a blown tessera cannot be rebuilt.
- Switch off stabilization on the tripod, along with flash and any auto-HDR mode that flattens contrast.
- Try a polarizing filter for glazed tile, glass smalti, or anything behind glass. Rotate it slowly and watch the surface. It costs a stop or two of light and can shift color slightly on some metallic finishes, so use it deliberately rather than as a default.
Fill the frame in camera, and shoot one reference frame with a gray card in the corner. You will thank yourself when you are batch-editing twenty pieces at midnight.
Taming the hard cases: glass, smalti, and gold
Near-mirror surfaces need bigger light and darker surroundings. Build a small tent: diffusion above and to one side, black card on the other three sides, camera poking through a gap. For gold smalti the surround matters more than the light.
Photo: Amar Preciado / Pexels